


How to DIY Your Wedding Aisle Decoration with Statement Candle Sticks
Flickering candles can bring a magical effect to your wedding day. Imagine a sea of tiny flames lighting your way down the aisle, guiding you like fireflies to the wedding arch, where the love of your life is waiting for you.
Today, we’re here to show you how to bring light to your wedding ceremony with these DIY statement candlesticks. Use them to light up the aisle, or bring warmth to other areas of your wedding ceremony or reception. We’ll use Ling’s Moment DIY flowers and greenery to create this design, so you can prepare it ahead of time for your wedding day.
What you’ll need
To create your DIY wedding aisle decor, you’ll need:
- 2 Free-Standing Decorative Candlestick bases
- Floral Wire
- Iron Wire
- 4 Floral Foam Blocks
- Wire cutters
- Utility Knife
- Candles
- Your creative spirit
These materials will create two free-standing floral candlesticks, ideal to display beside your wedding arch or to line the aisle.
We’re using our designer flower boxes to make this DIY candle decor, since they feature a blend of flower sizes and types in a single color palette. This makes it simple to match these DIY candlesticks with the rest of your ceremony and reception decor. For this example, we used two plum designer flower boxes in different styles.
Feel free to customize your design with any color palette of your choosing, or to supplement your designer boxes with foundational flowers like roses or peonies.
How to make a DIY wedding aisle decoration:
Step 1: Prepare the base
We’ll begin by preparing the base of our candlestick.
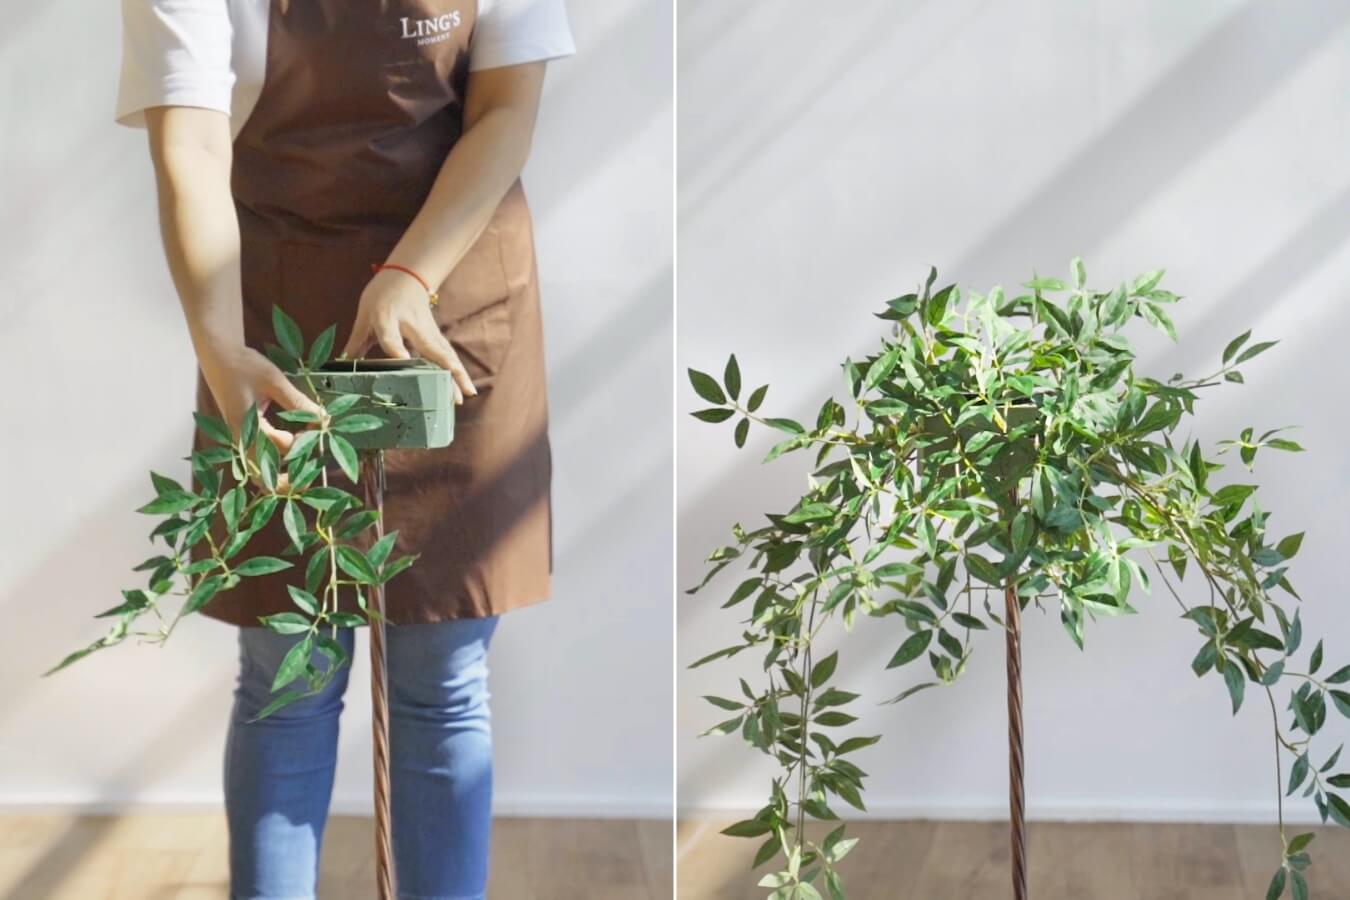
Cut a piece of floral foam into two pieces, then use a long iron wire to secure it below the base of the candleholder. Snip the excess wire with your wire cutters, then cut off the sharp corners of the floral foam to round the edges.

Step 2: Add greenery
Now, let’s get our greenery ready. Take one box of rosa banksiae vines and cut them into varying lengths.
Insert the branches into the floral mud one by one. Try to arrange the longer branches drooping downward and the shorter branches springing upwards to create a full, “bushy” effect. Keep going until you’ve used all the greenery.
Tip: Don’t worry if there are still some pieces of foam visible. We’ll use flowers to fix that. (Don’t forget to check out our standing flowers, while you’re at it.)
Step 3: Add flowers
Now, let’s bring color to our candlestick with our flower boxes.
Take half the flowers from each of your boxes and insert them into the floral foam. If the wire stems are too long, give them a trim with your wire cutter. Arrange the flowers in a circular pattern, using them to fill the gaps between the leaves and hide the foam from view.

Try to style the flowers in clusters, as if you were arranging miniature bouquets on top of your candlestick. Your flowers should all work together to create a more beautiful, cohesive whole. This is your time to let your design sense shine, so feel free to experiment as you bring your vision to life.
Step 4: Do it all again
Once you’ve finished creating the design for your first candlestick, repeat the process to create a second one.

From there, all you need are candles and you’ll be ready to display your candlesticks at your ceremony! We recommend styling these DIY candlesticks with smaller candles on the ground to create a luminous effect, but we’d love to see the unique ways you’ll style your floral creation at your wedding day.

Tag us on Instagram to show us your new DIY designs and have a chance to be featured on our website, so that your style can inspire other brides. We’re excited to be a part of your special moments!


