


How to Use a Braid Wedding Table Runner: A Step-by-Step DIY Guide
Introduction
As a standout element of table linens, a braid wedding table runner infuses any wedding setting with distinct personal style and handcrafted elegance when incorporated into your event decor. This DIY decor idea, centered around this key piece of table linens, seamlessly blends texture, color, and style—no complex skills required to elevate your overall setup. Below is a detailed breakdown of the entire process, from preparation and weaving to styling, helping you easily create a high-quality wedding table centerpiece with this special part of table linens.
Materials & Preparation for a Braided Table Runner
Choosing the right materials is the core foundation of a beautiful braided table runner, directly influencing the texture and visual appeal of the final piece.
Step 1: Select Coordinated table linens
Prioritize table linens in complementary or gradient tones with a consistent width. Matching color palettes create a soft, romantic ambiance, while contrasting hues deliver a bold, modern look—different color schemes can bring entirely distinct vibes to your wedding.
Pro Tip: When cutting the table linens, always make them slightly longer than the actual length of your table. The extra length not only accommodates adjustments during weaving but also leaves room for creative finishing touches, preventing issues from insufficient length.
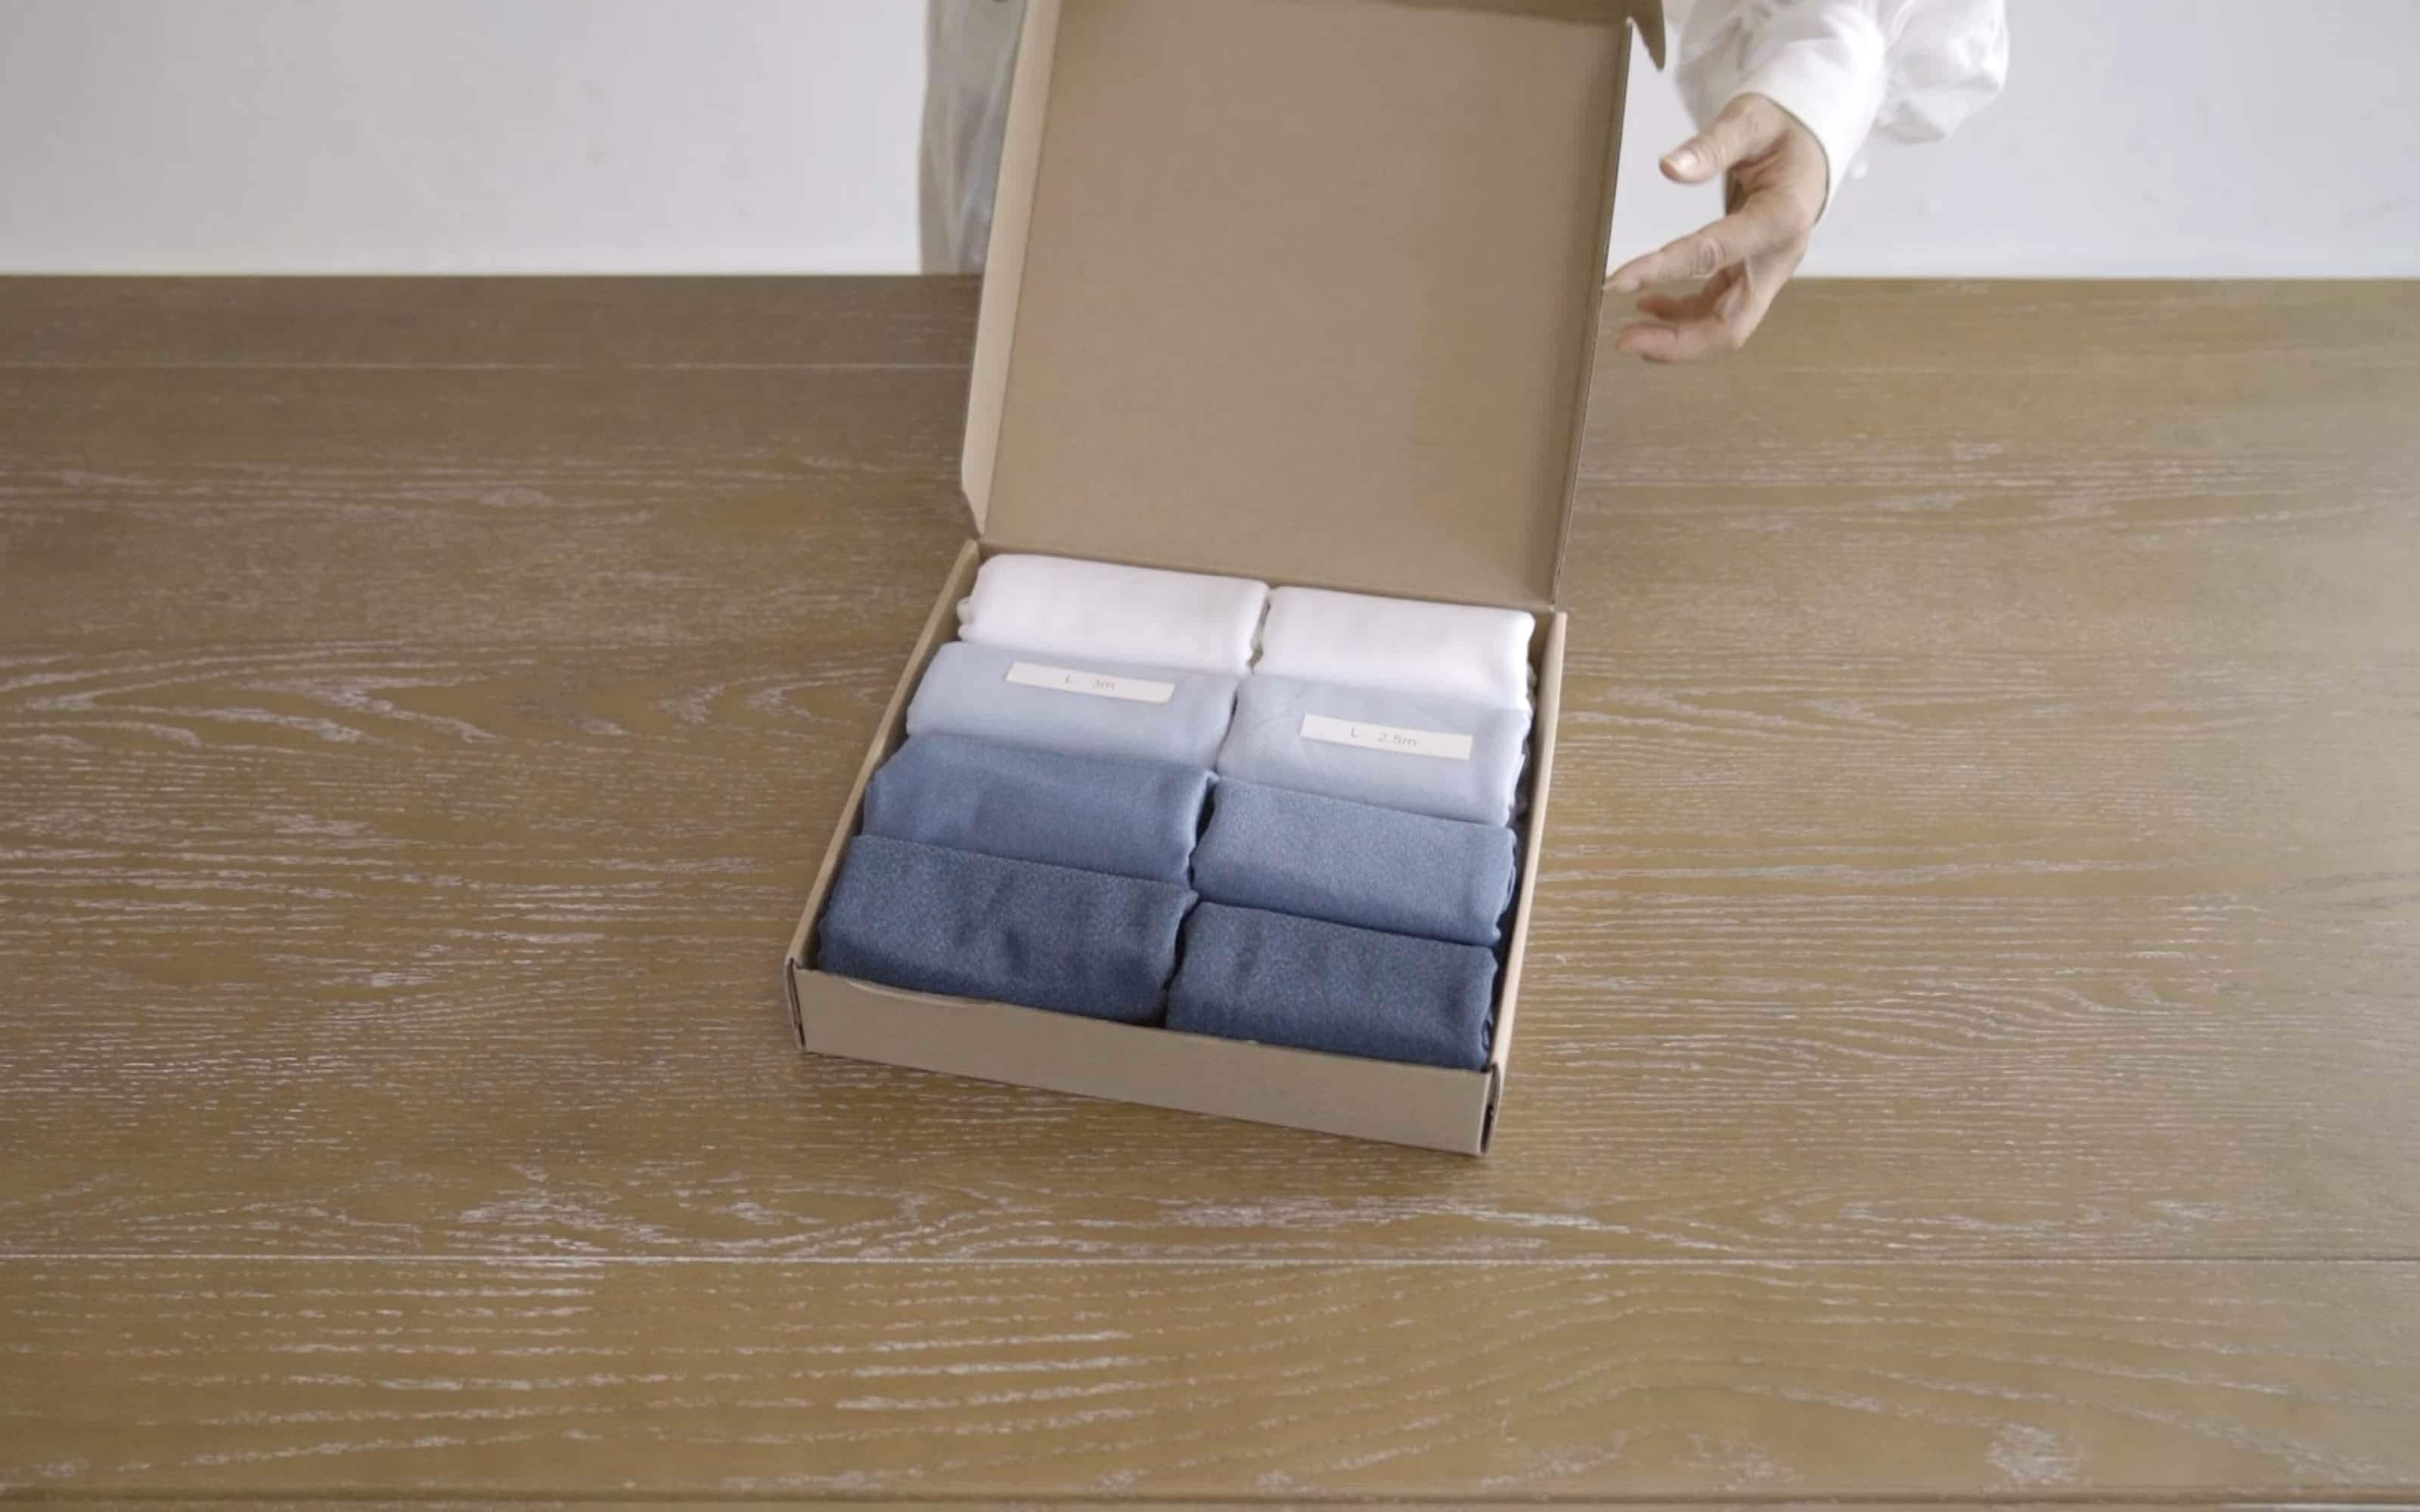
Step 2: Choose the Right Tablecloth
Opt for a solid-colored tablecloth; a plain background better highlights the details and layering of the braided texture. For enhanced dimension, select fabrics with a subtle sheen—under the ambient lighting of a wedding venue, these fabrics amplify the 3D effect of the braided pattern, making the table runner look more refined.
Step 3: Pre-Iron the table linens
Iron each ribbon flat before weaving to ensure no wrinkles remain. Smooth table linens make the weaving process smoother and guarantee a neat, clean appearance for the final product, avoiding messy patterns caused by wrinkled table linens.
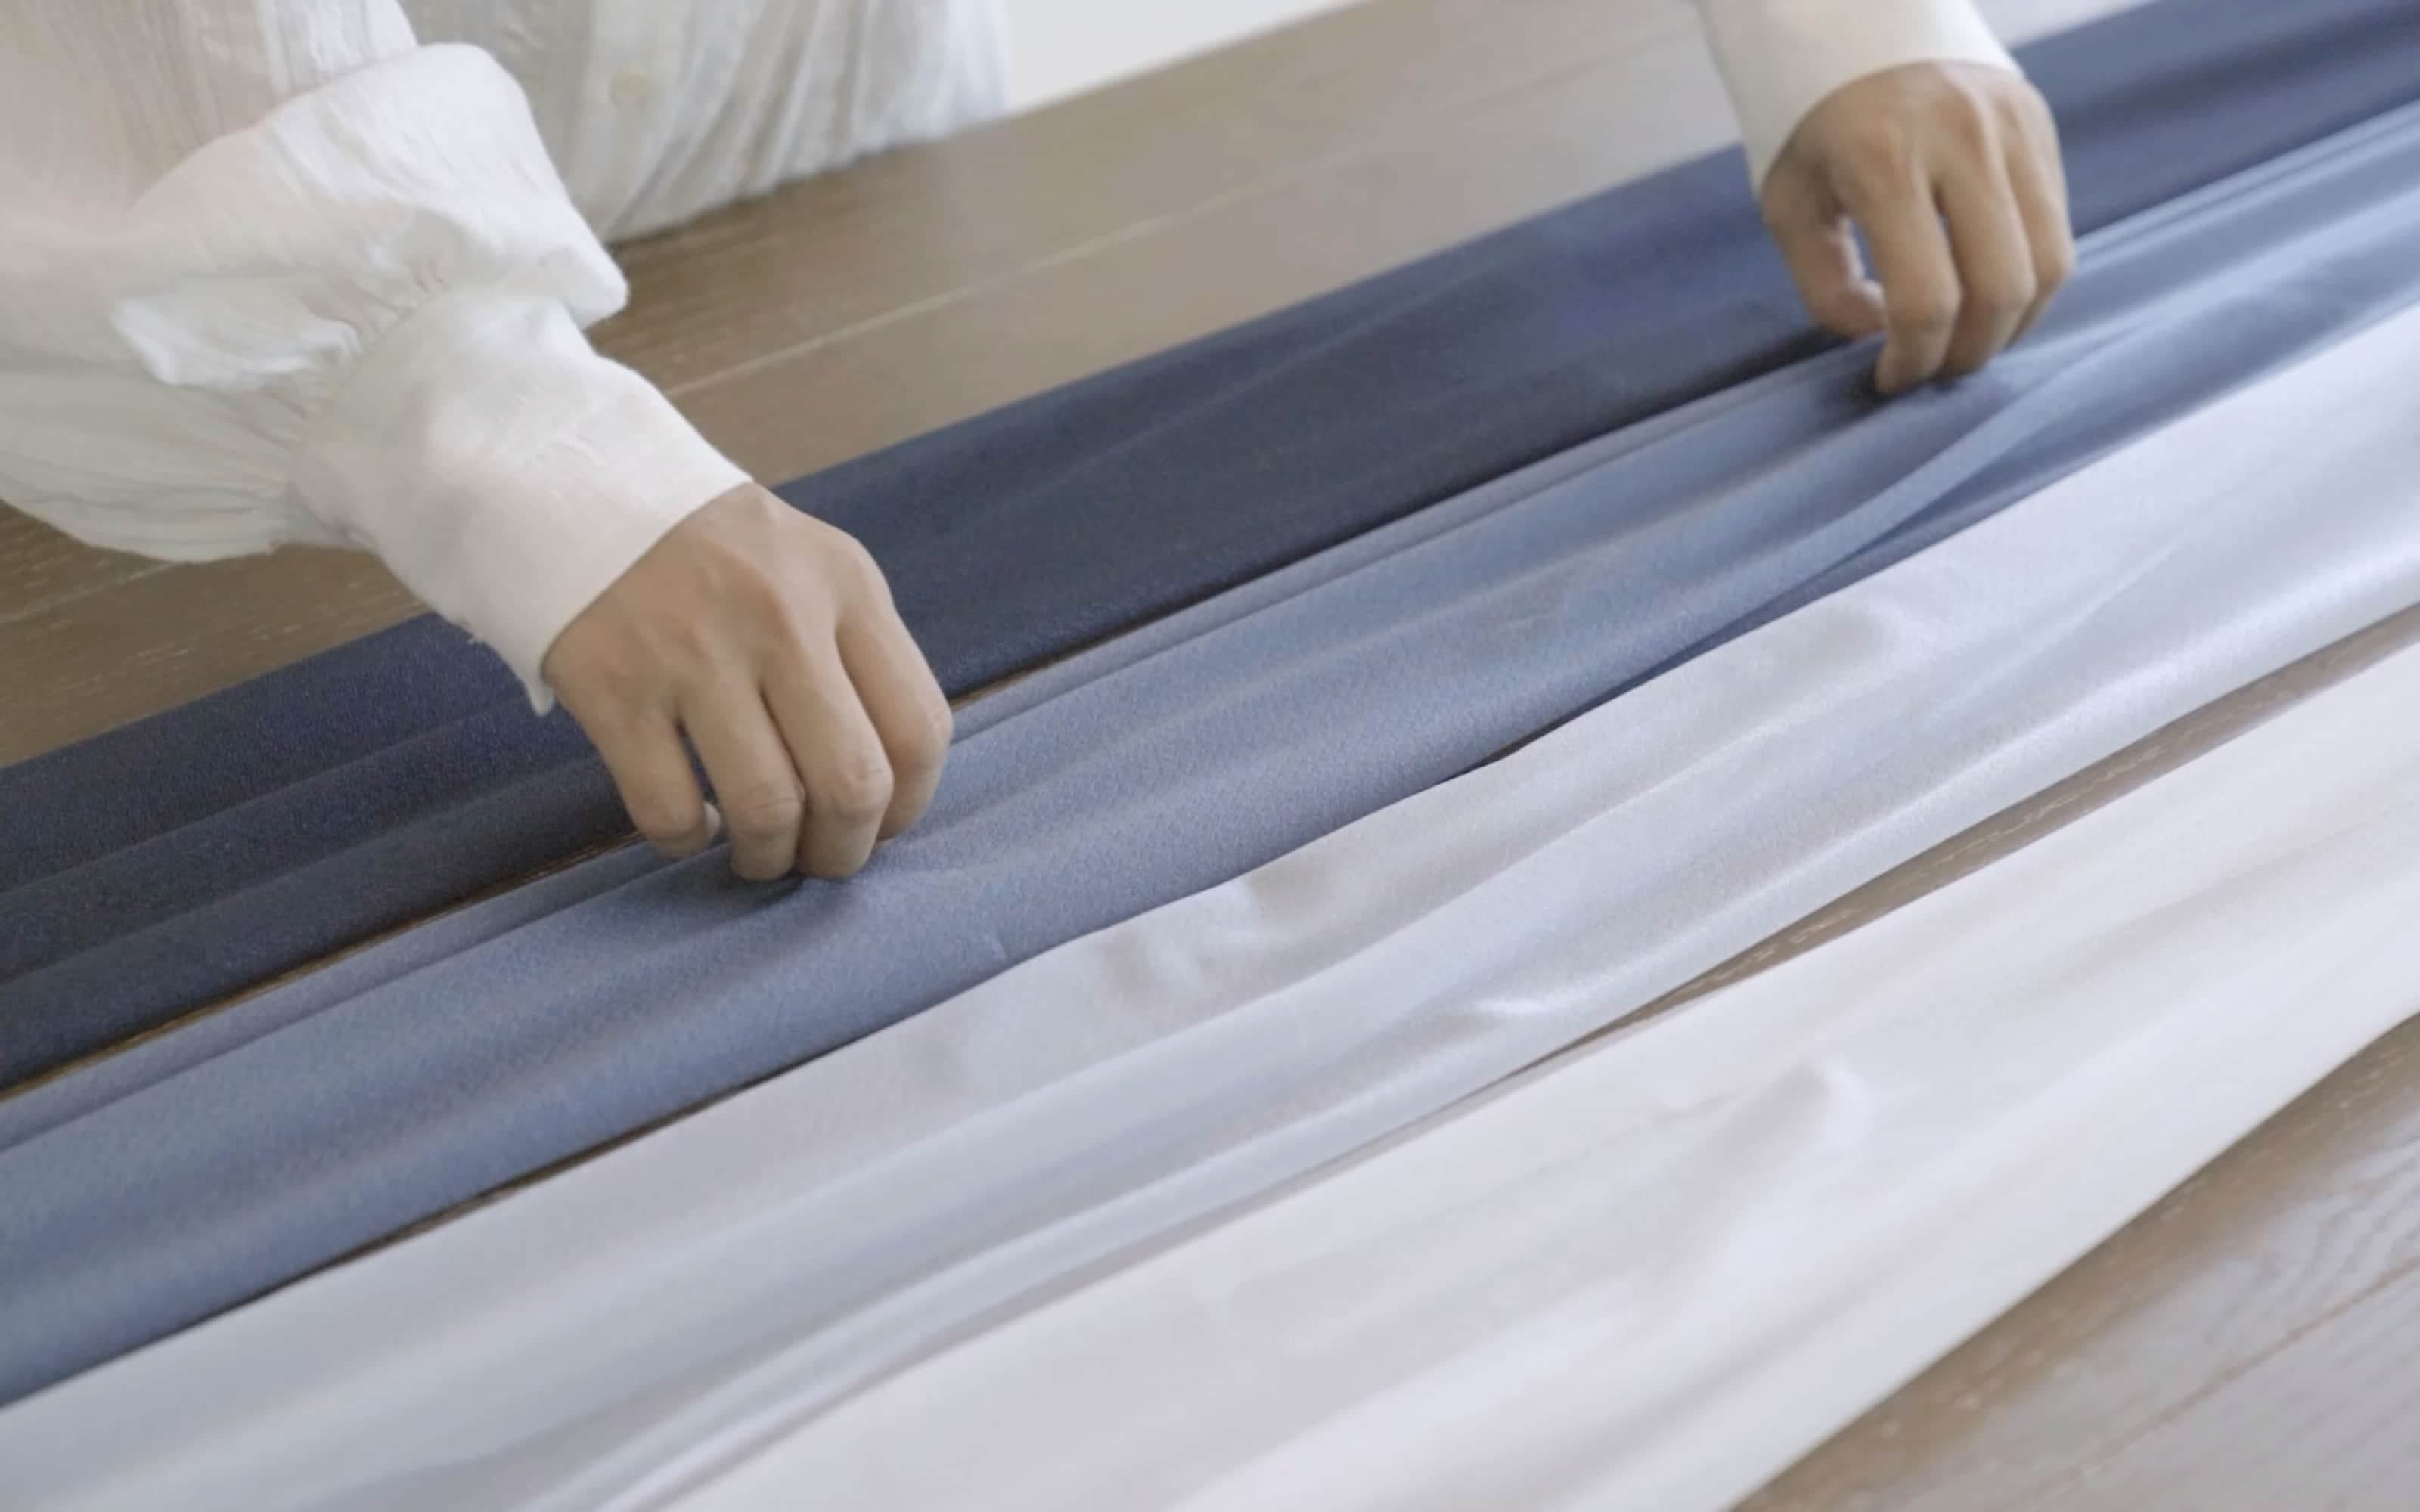
Starting the Weave: Alignment & Securing
Step 4: Secure One End of the table linens
Before official weaving, align one end of all table linens neatly and fasten them to one edge of the table. You can choose flexible fixing methods: clamp them tightly, secure with double-sided tape, or tuck the ribbon ends under the tablecloth to hide them.
This step serves as the "foundation anchor" for the entire weaving process—it not only determines the direction of the table runner but also controls the tension of the table linens, laying the groundwork for even weaving later.
Weaving Technique: How to Create a Braid Table Runner
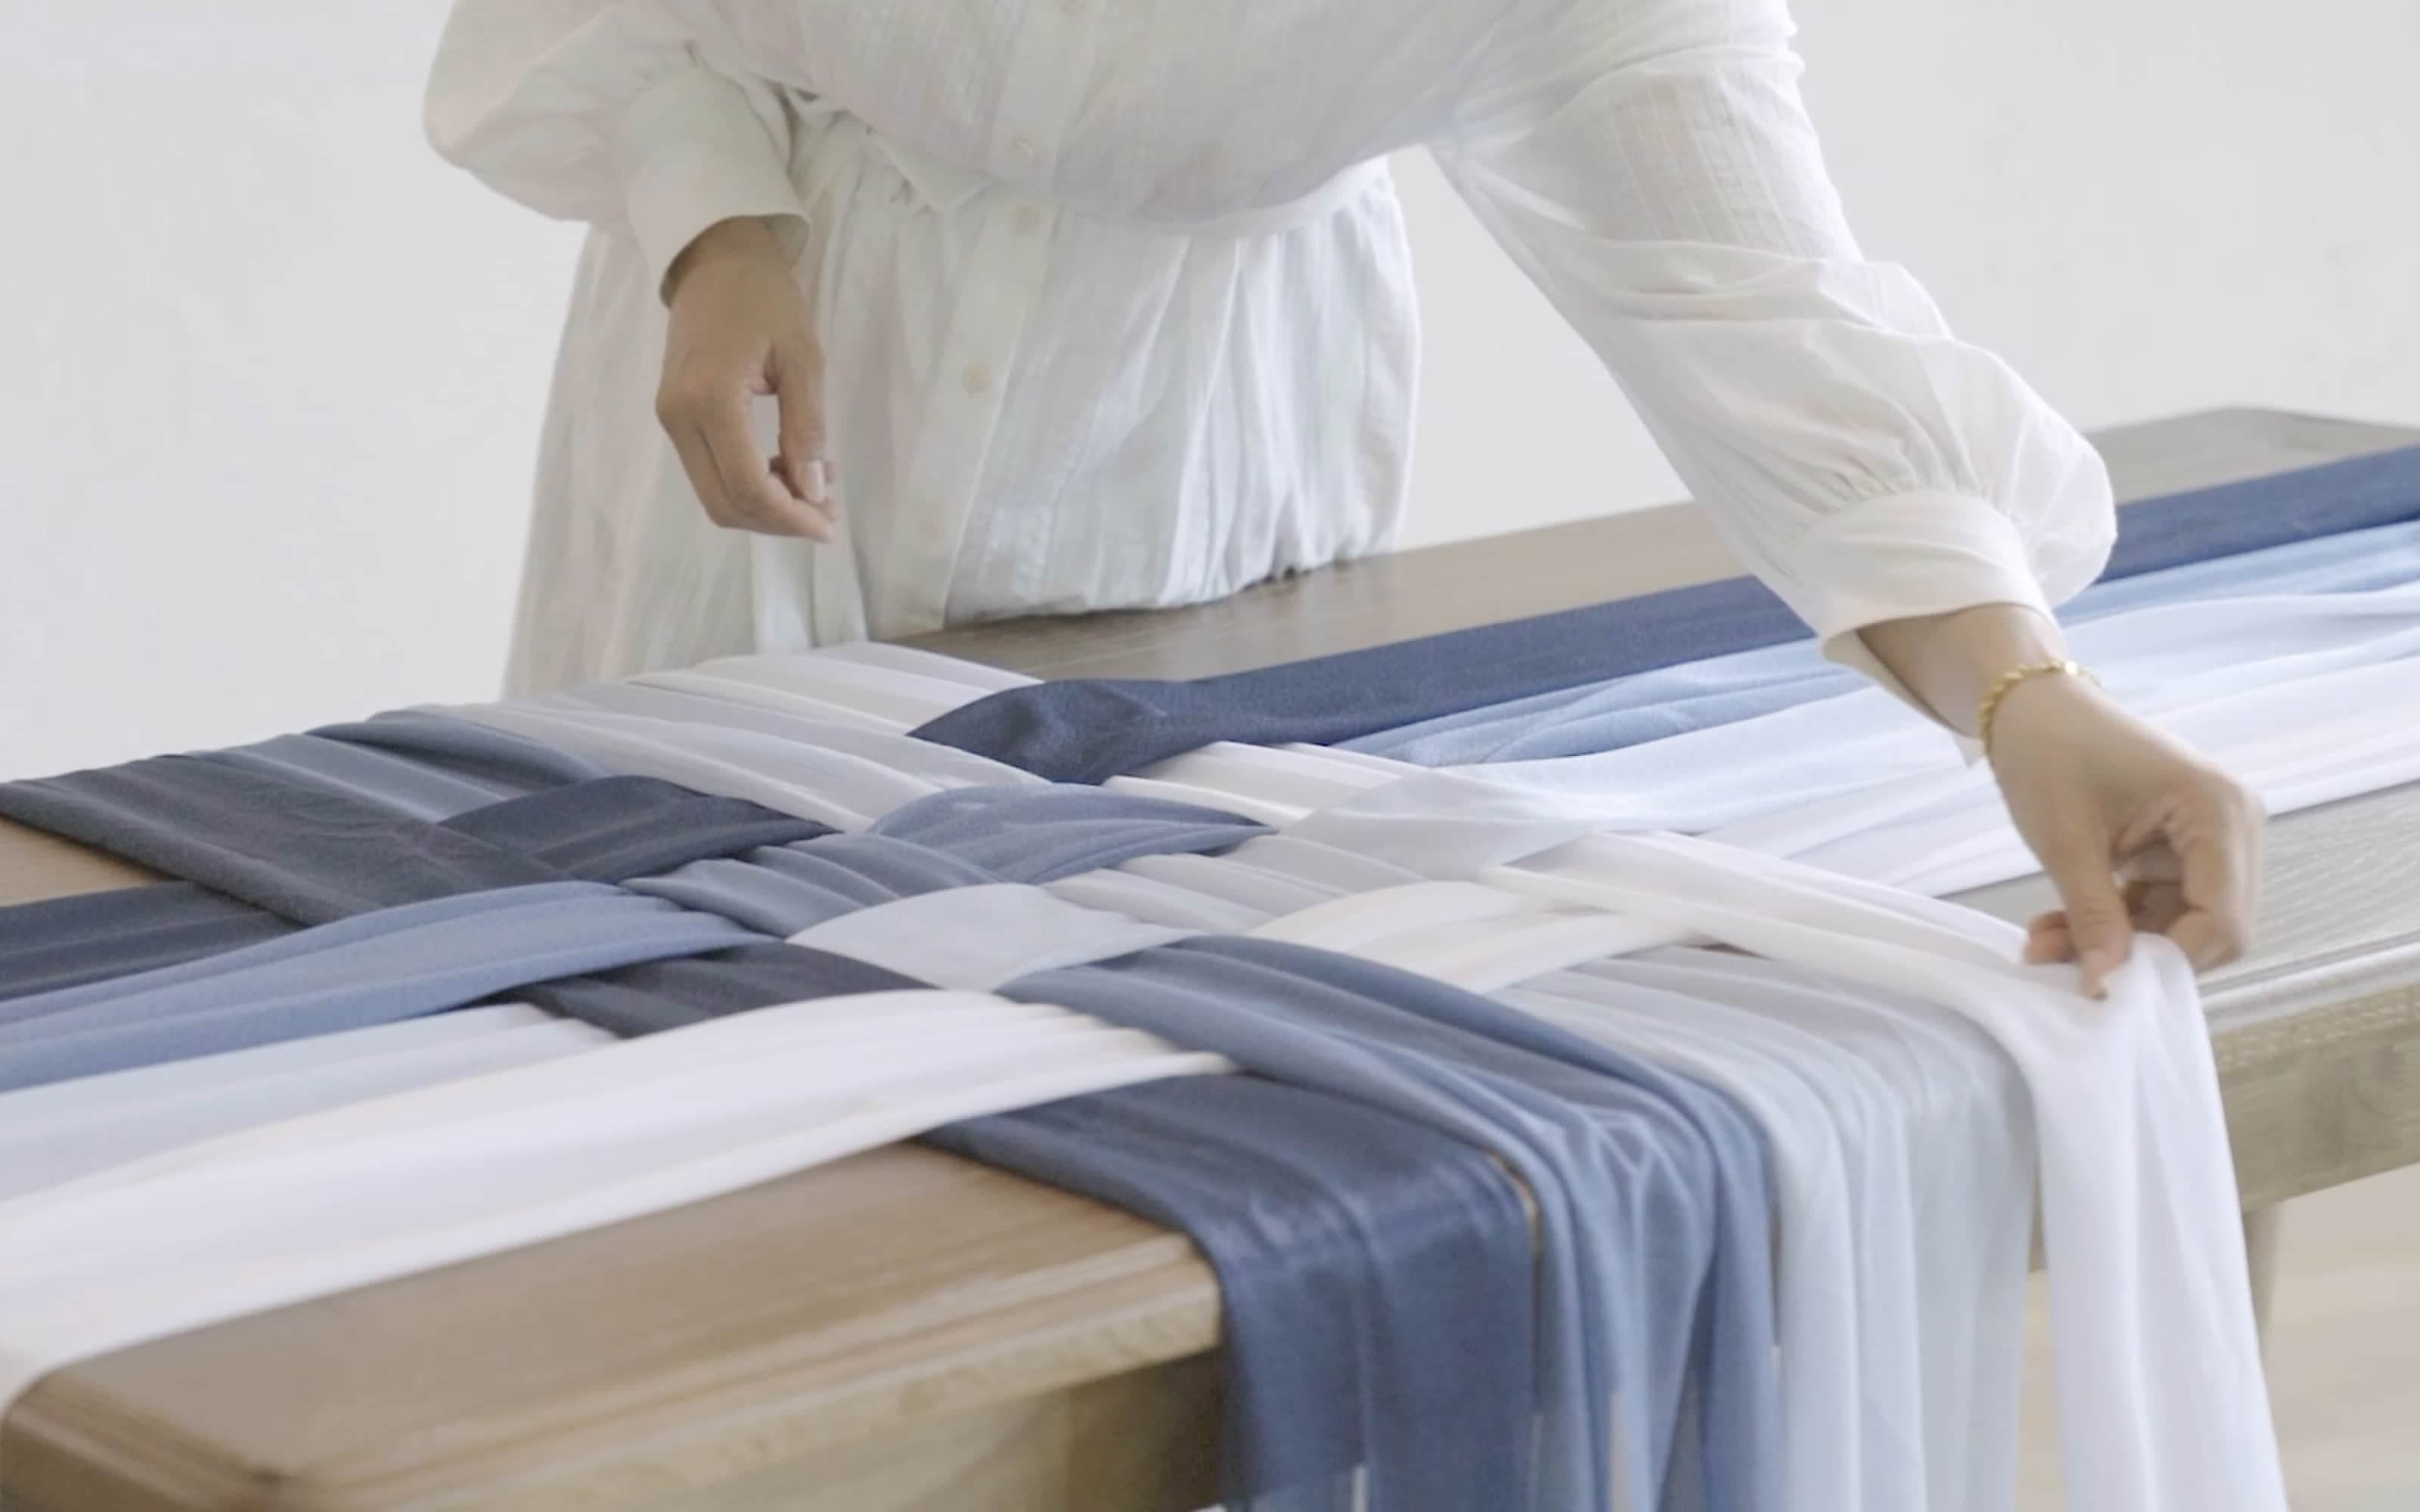
Step 5: Weave One Ribbon at a Time
Start with the leftmost ribbon and alternate weaving it over and under the remaining table linens (similar to the "over-under" method in traditional weaving). Use gentle, slow hand movements to avoid twisting the table linens, allowing them to naturally form smooth curves and maintain the organic look of the braided texture.
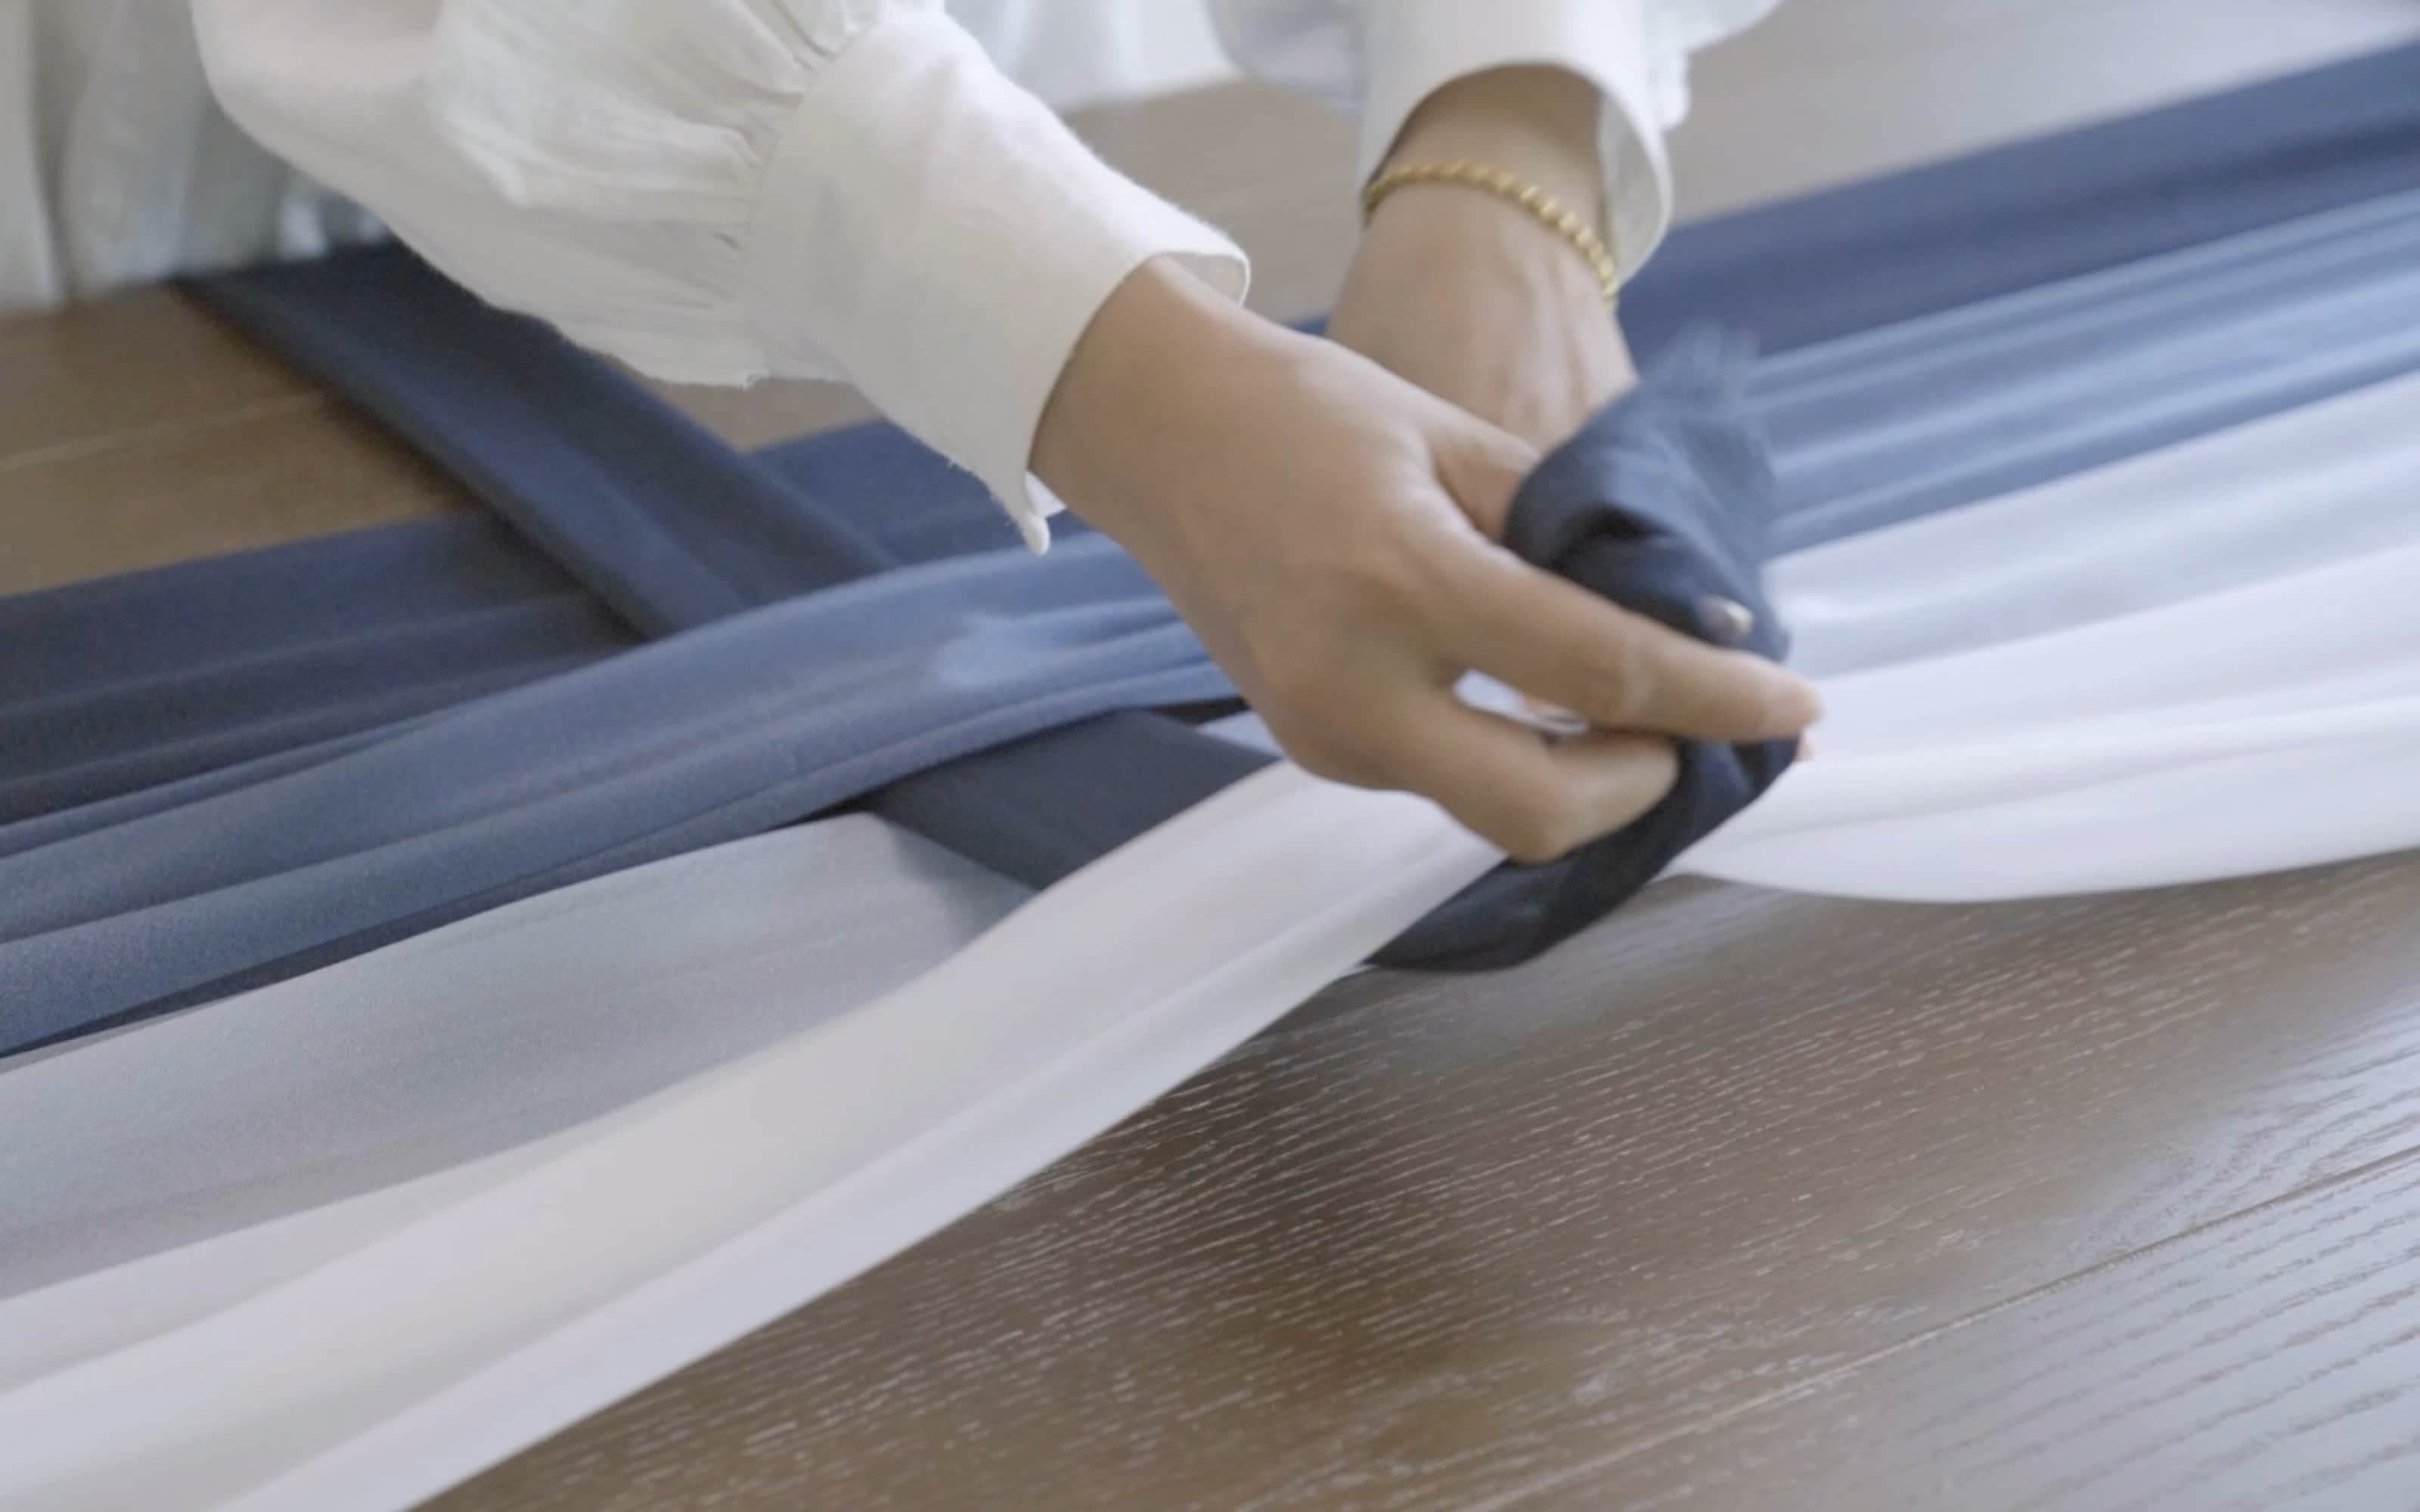
After finishing the first ribbon, move on to the next—ensure it is slightly offset from the weaving nodes of the previous one, avoiding complete overlap. Repeat this process to gradually create a regular, rhythmic grid pattern.
This "one-by-one offset weaving" method ultimately results in a layered, elegant interlaced effect, giving the table runner both artisanal warmth and a sense of design.
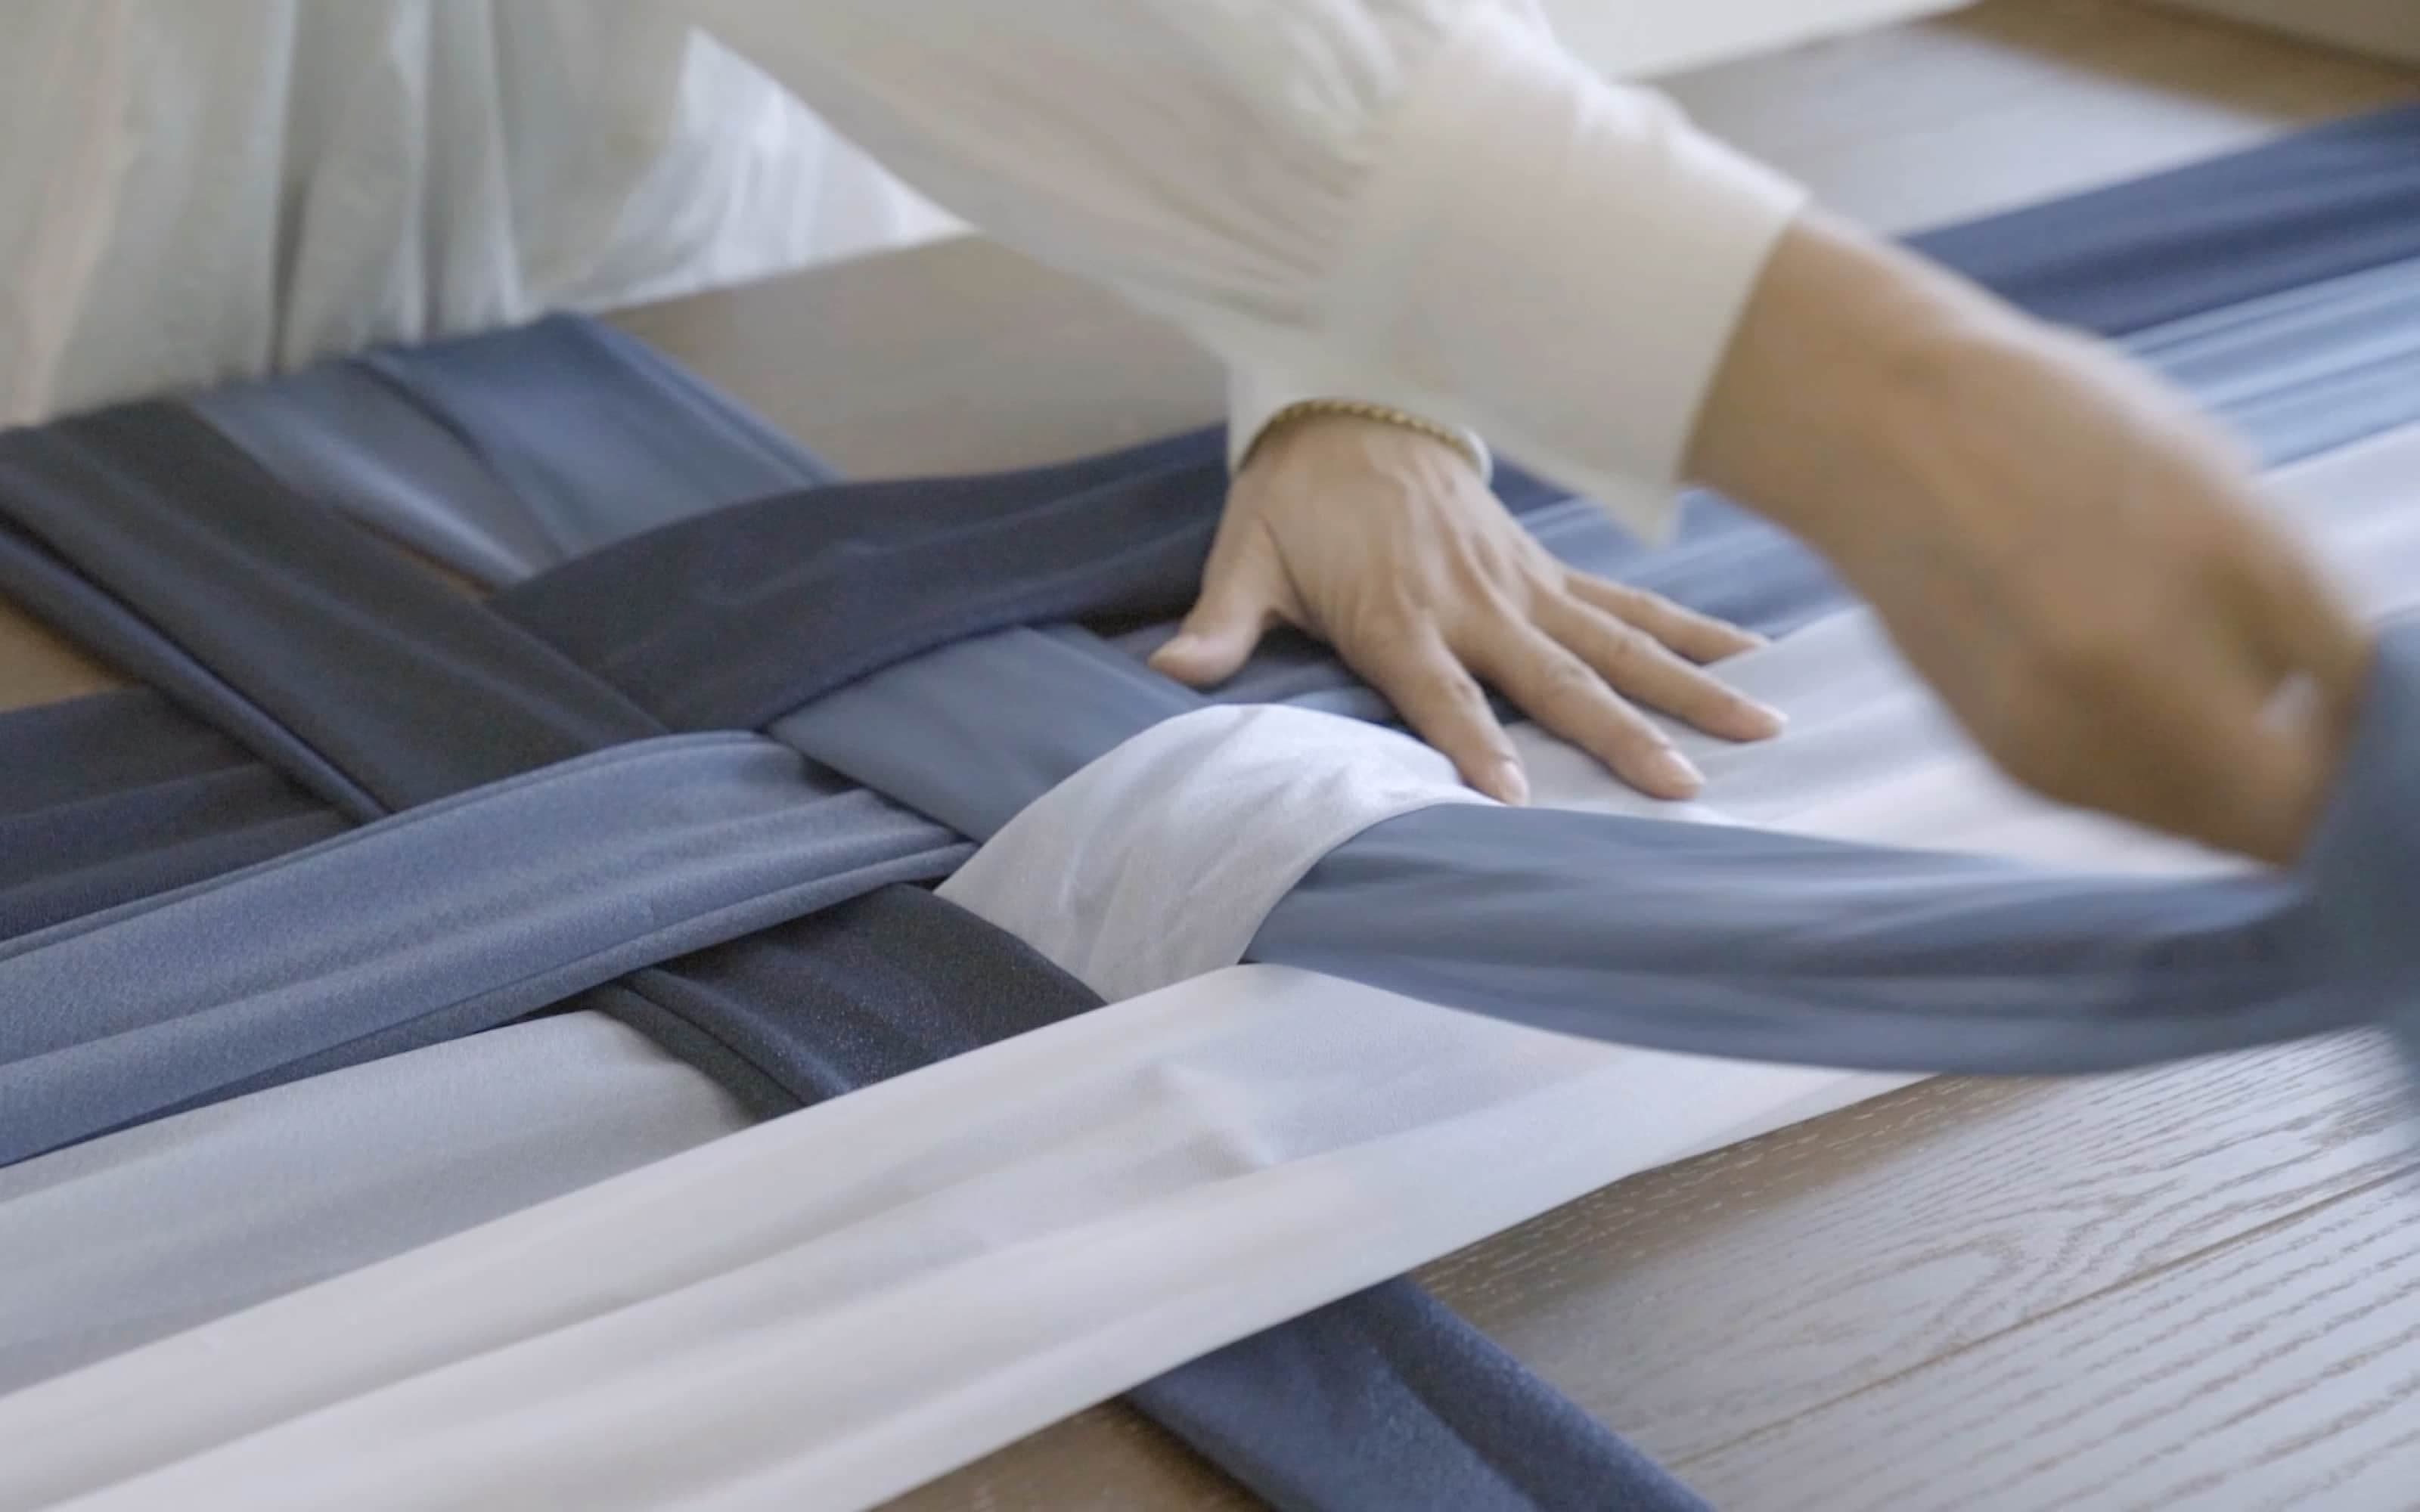
Maintaining Shape: Mid-Weave Adjustments
Step 6: Adjust as You Go
Don’t rush through the weaving process. It’s recommended to pause every 3-5 weaving nodes to check and adjust the spacing and tension of the table linens. Strive for uniform spacing between each grid—this gives the table runner a "professional look" and prevents messy areas of loose or tight weaving.
If a ribbon twists (e.g., flipping from the front to the back) during weaving, gently smooth it out by hand. Ensure the surface of the table runner remains flat at all times and the braided patterns on both sides are symmetrical to maintain overall visual balance.
Finishing Touches & Styling Options
Step 7: Creative Ways to Finish the Runner
Once weaving is complete, choose a finishing style that matches your wedding theme to make the table runner blend seamlessly with the overall decor:
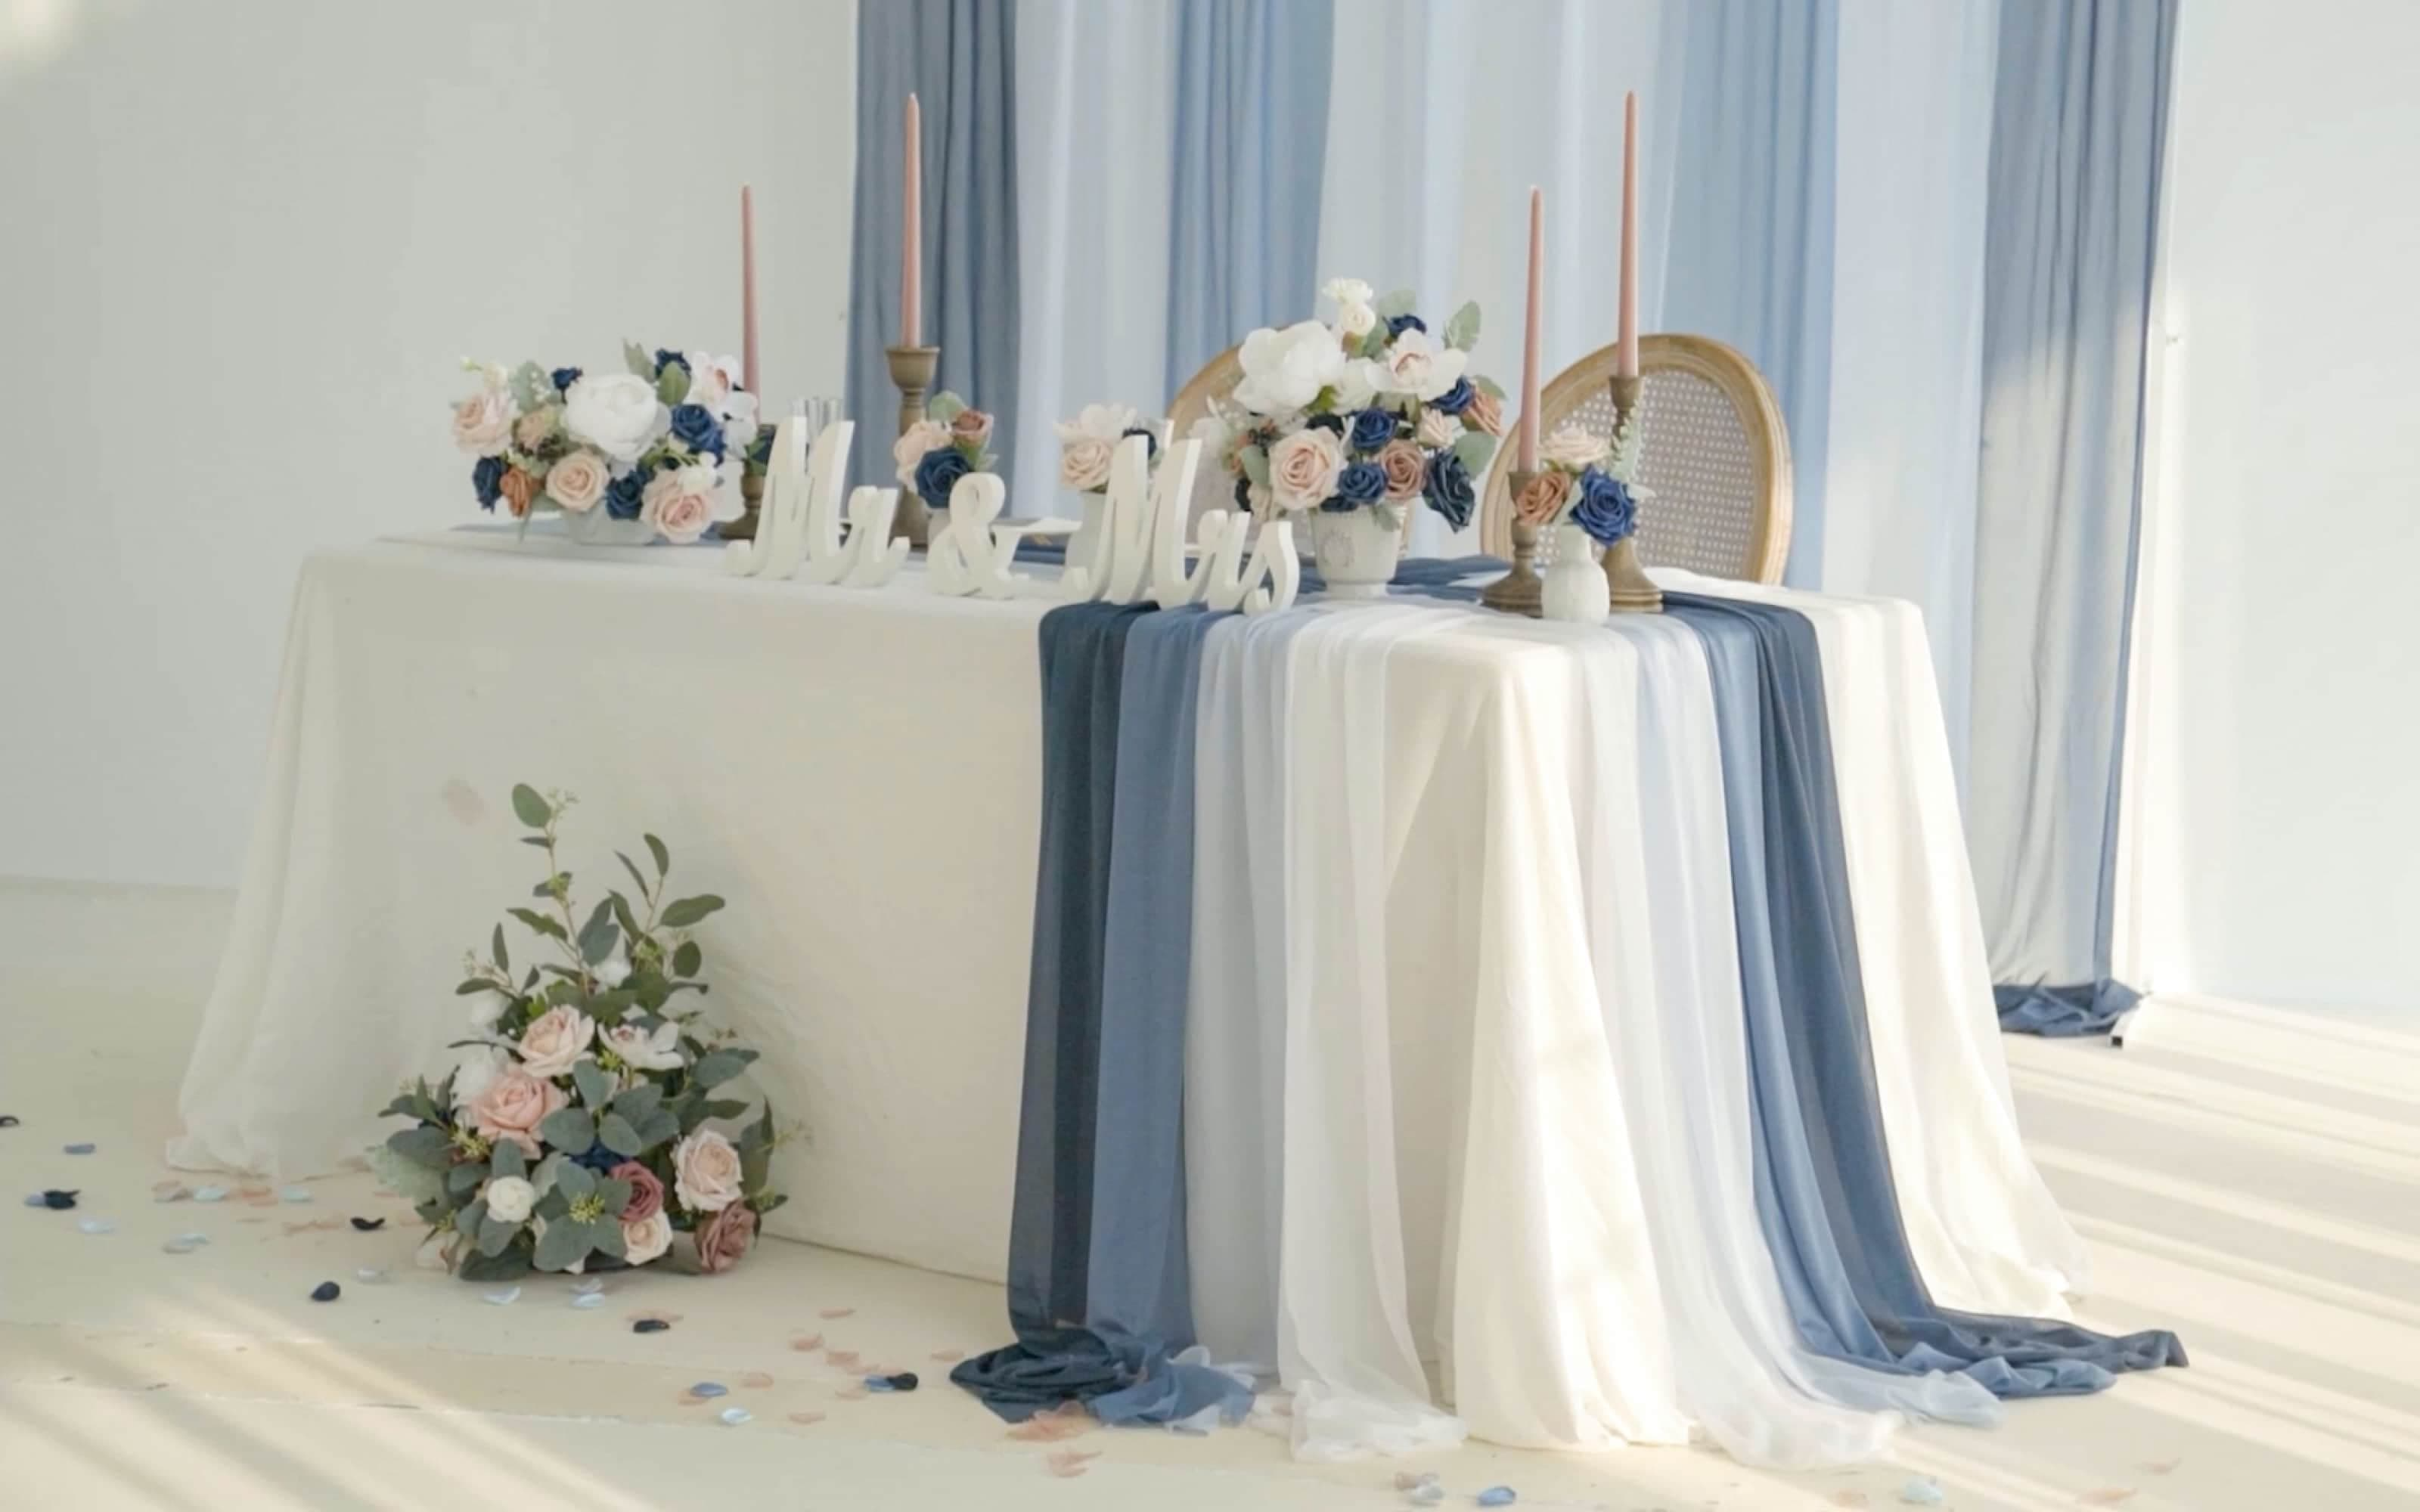
- Natural Draping: Let the ribbon ends hang freely over the sides of the table for a light, casual ambiance—perfect for outdoor garden weddings or bohemian-style weddings.
- Neat Tucking: Tuck the ribbon ends neatly under the tablecloth, or secure them with a matching ribbon knot before hiding them. This creates a clean, sleek look, ideal for modern minimalist or luxury weddings.
- Decorative Embellishments: Add wedding-themed decorations to the finished ends, such as a small bunch of artificial flowers, a tiny bow, or metallic decorative clips. This enhances the design sense of the table runner while echoing other wedding elements.
- Different finishing styles can directly transform the table runner’s vibe—whether soft and romantic, chic and elegant, or rustic and natural, it can be achieved with simple adjustments.
The Final Look: Elegant & Personalized
The completed braid wedding table runner resembles a small handcrafted textile artwork—it boasts layered visual texture and a delicate tactile feel (from the softness of the ribbon material). It skillfully fills the "empty space" on the table, infusing it with rhythm and balance, while incorporating your personal creativity (such as color matching and finishing decorations) to keep the table from looking monotonous.
For weddings, the significance of this DIY decor goes beyond "beauty": it carries the handcrafted care of the couple, allowing guests to feel the warmth of the wedding’s details and becoming a memorable "small highlight" of the event.
FAQs: Braid Wedding Table Runner
1.What type of ribbon works best for a braid table runner?
Satin or grosgrain table linens with a consistent width are recommended. Satin table linens have a subtle sheen, suitable for luxury or romantic weddings; grosgrain table linens have a clearer texture, ideal for rustic or bohemian weddings. Both types have moderate stiffness—easy to weave and shape, without collapsing due to being too soft, ensuring the 3D effect of the braided pattern.
2.How much extra length should I leave for the table linens?
Each ribbon should be 1.5 to 2 times the length of your table. For example, if your table is 1.2 meters long, cut the table linens to 1.8-2.4 meters. The extra length not only accounts for "weaving loss" but also meets the needs of finishing touches (such as draping or knotting), preventing a hasty finish due to insufficient length.
3.Can I use table linens of different widths?
It’s technically possible, but not recommended for beginners. table linens of varying widths easily disrupt the "uniformity" of the braided pattern, potentially leading to uneven grid spacing and messy textures that harm the overall visual neatness. If you want to try a creative mix, use a regular "wide-narrow alternating" pattern (e.g. 2cm wide + 1cm wide) and avoid large width differences to reduce weaving difficulty.
4.How do I prevent table linens from slipping during weaving?
In addition to securing one end (e.g., with clamps), gently press the already woven section with your hand during the process to keep the table linens stable. Meanwhile, adjust the tension of the table linens slightly every 1-2 weaving nodes to prevent slipping caused by loose table linens.
5.Which occasions are suitable for this table runner?
Beyond weddings, it’s perfect for various romantic or warm events: bridal showers, engagement parties, garden parties, and even baby showers or birthday parties. Simply adjust the ribbon color (e.g., pastels for baby showers, theme colors for birthdays) to fit different occasions.
6.Can the braid table runner be reused?
Absolutely! With proper storage, it can be reused multiple times: after the wedding, disassemble it (untie the fixed end and remove each ribbon one by one), clean and iron the table linens, then store them. Later, they can be used for other crafts (such as gift wrapping or home decor) or re-woven for future events—eco-friendly and cost-effective.
Final Thoughts
Creating a braid wedding table runner is a "low-difficulty, high-reward" DIY project—no professional crafting skills needed, just patience and creativity to add depth, texture, and elegance to your wedding decor. From material selection to weaving and finishing, every step lets you infuse your personal style: choose your favorite color palette, match theme-appropriate decorations, and finally transform an ordinary table into a "visual focal point" of the wedding—impressing every guest with the beauty of small details.


